Getting started with Swift in VS Code
Visual Studio Code (VS Code) is a popular general purpose editor that supports a variety of languages through extensibility. The Swift extension brings Swift language-specific features to the editor, providing a seamless experience for developing Swift applications on all platforms.
The Swift extension includes:
- Syntax highlighting and code completion
- Code navigation features such as Go to Definition and Find All References
- Refactoring and quick fixes to code
- Package management and tasks with support for Swift Package Manager
- Rich support for debugging
- Testing with XCTest or Swift Testing frameworks
The Swift extension is designed to support the following projects:
- Swift Package Manager projects (e.g. using a
Package.swift) - Projects that can generate a
compile_commands.json(e.g. using CMake)
Install the Extension
- First, install Swift. If you do not already have Swift installed on your system, see the Getting Started Guide on Swift.org.
- Download and install Visual Studio Code.
- Install the Swift extension from the VS Code Marketplace or directly from within the VS Code extensions pane.

Creating a new Swift project
To create a new Swift project, you can use the Swift: Create New Project... command in
the Swift extension to guide you through the process. You can find this command by opening
the Command Palette and following the instructions below.
- For macOS:
CMD + Shift + P - Other platforms:
Ctrl + Shift + P

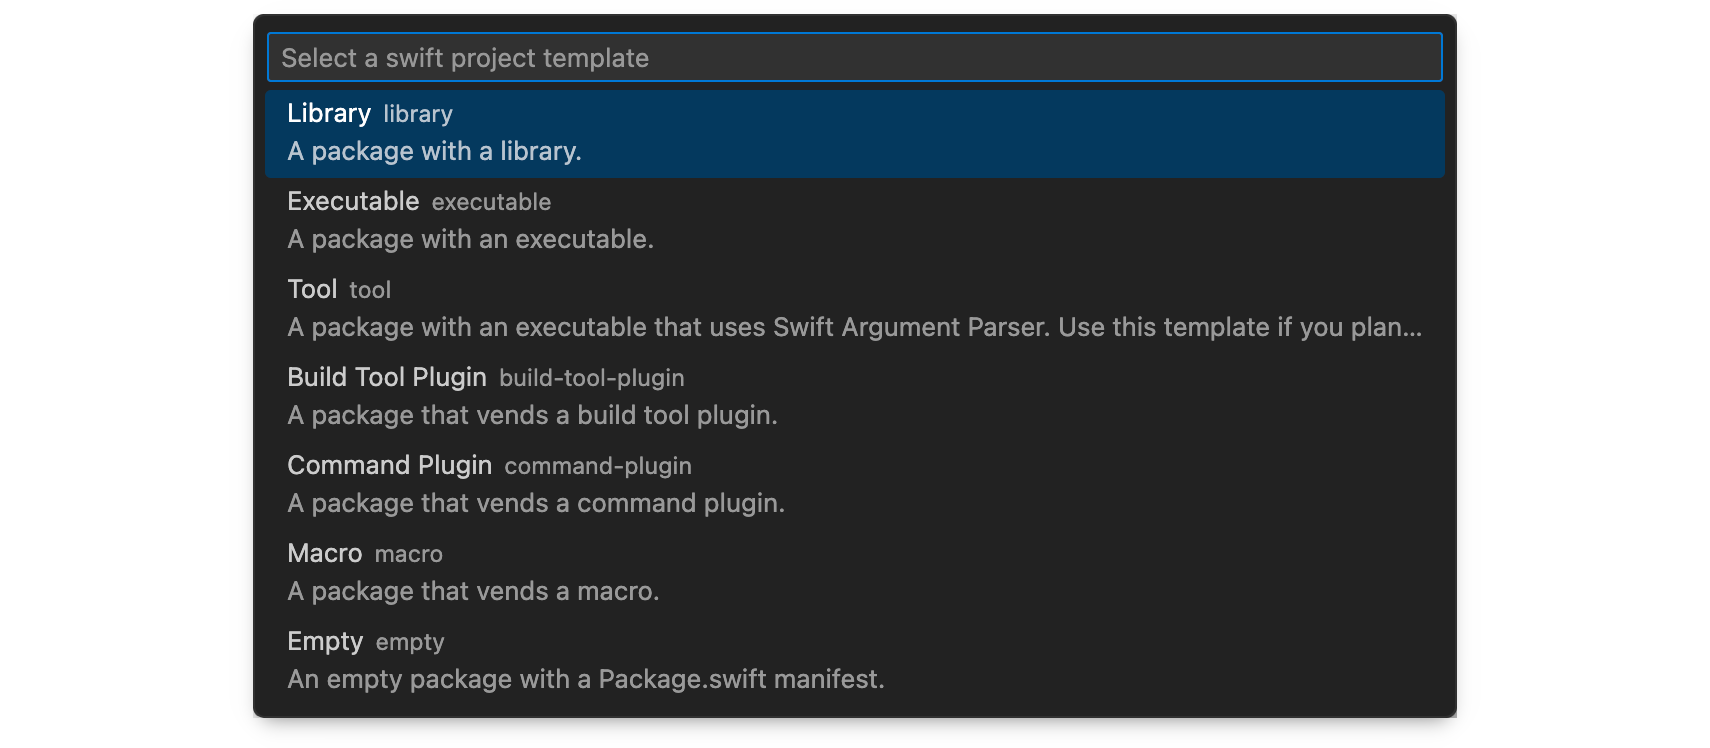
- Choose the type of project you’d like to create from the list of templates.
- Choose the directory where the project will be stored.
- Give your project a name.
- Open the newly created project. You will be prompted to open the project in
the current window, a new window, or add it to the current workspace. The
default behaviour can be configured by using the
swift.openAfterCreateNewProjectsetting.
Language Features
The Swift extension uses SourceKit-LSP to power language features. SourceKit-LSP provides the following features in the editor. Use these links to see the VS Code documentation for each topic:
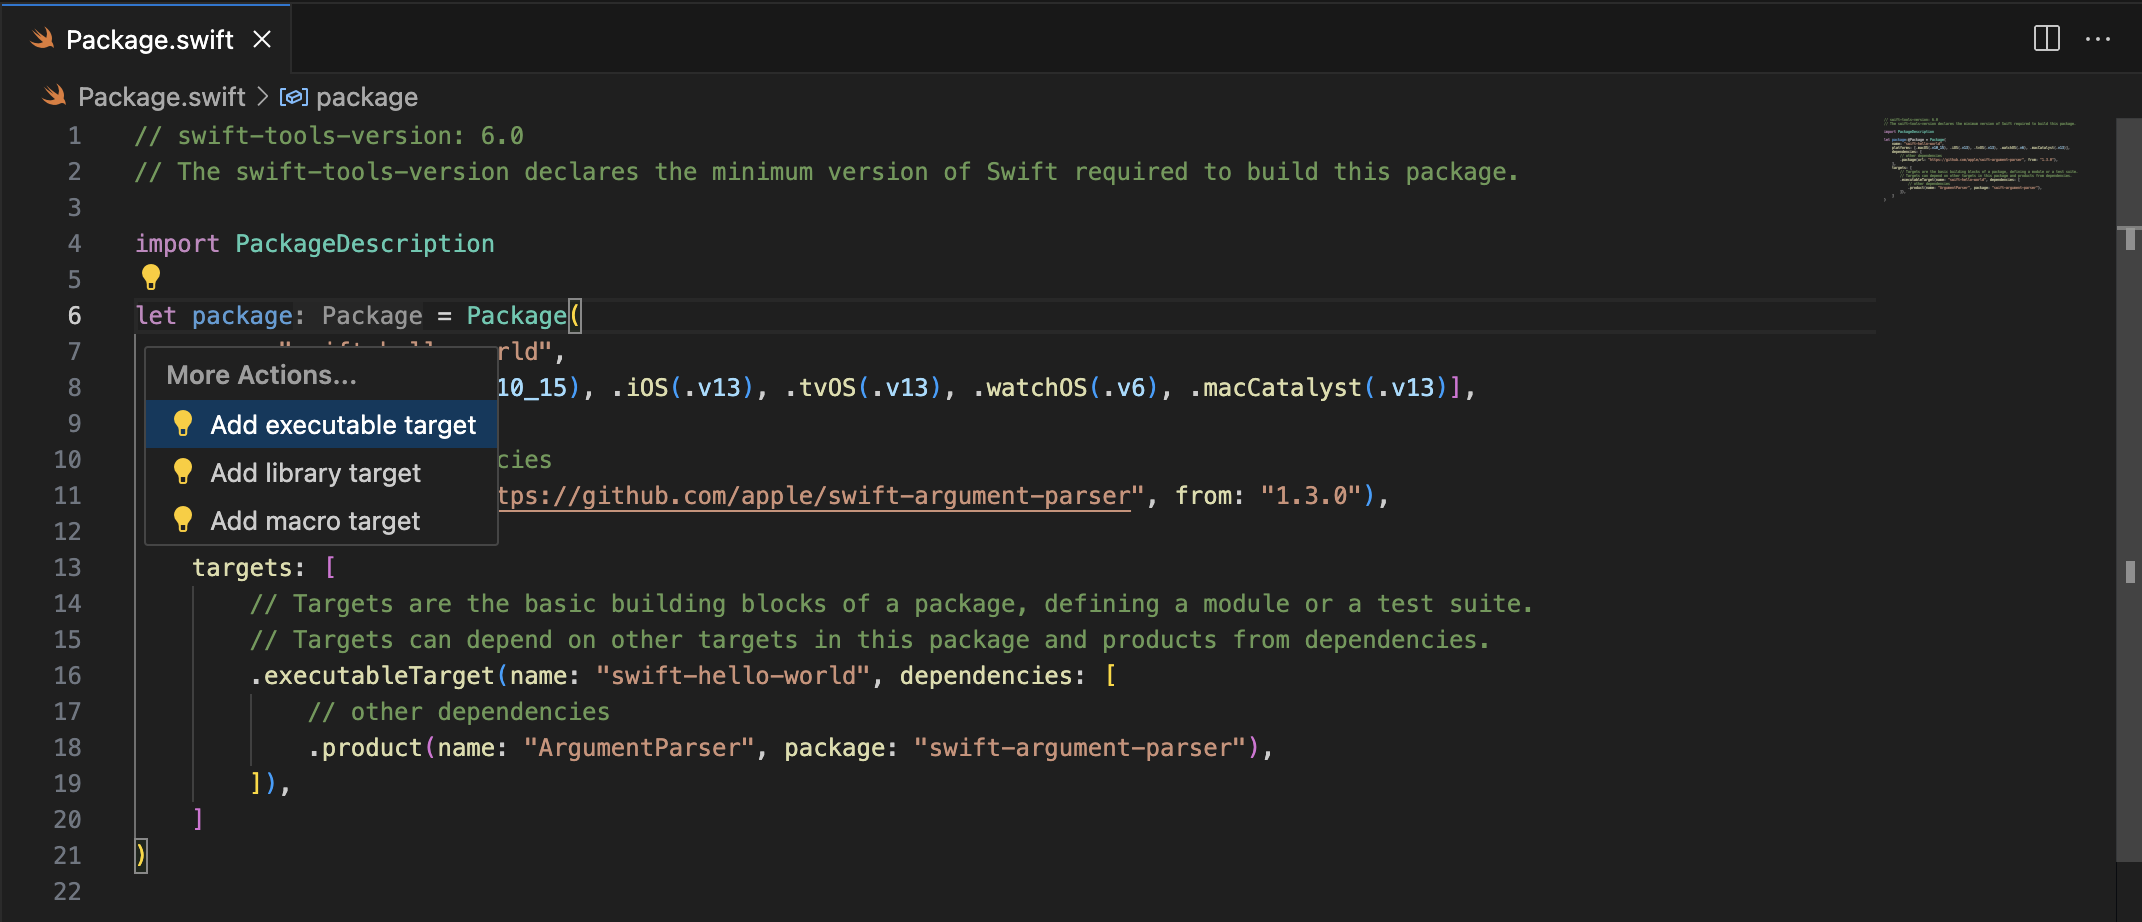
SourceKit-LSP also provides code actions to automate common tasks. Code actions in VS Code appear as a light bulb near the editor margin (see the below screenshot for an example of this). Clicking on the light bulb will show you the available actions which can include:
- Adding targets to your
Package.swift - Converting JSON to protocols
- Adding documentation to your functions

Before language features can be used you must perform a swift build command on your
project either on the command line or using a task in VS Code. This populates the index in SourceKit-LSP.
Swift Tasks
Visual Studio Code provides tasks as a way to run external tools. See the Integrate with External Tools via Tasks documentation to learn more.
The Swift extension provides some built-in tasks that you can use to build your project via
the Swift Package Manager. You can also configure custom tasks by creating a
tasks.json file in the root folder of your project. For example, this
tasks.json builds of your Swift targets in release mode:
{
  "version": "2.0.0",
  "tasks": [
    {
      "type": "swift",
      "label": "Swift Build All - Release",
      "detail": "swift build --build-tests",
      "args": ["build", "--build-tests", "-c", "release"],
      "env": {},
      "cwd": "${workspaceFolder}",
      "group": "build"
    }
  ]
}
The above task is configured to be in the build group. This means it will
appear in the run build tasks menu that can be opened with CMD + Shift + B
on macOS or Ctrl + Shift + B on other platforms:

Any errors that occur during a build appear in the editor as diagnostics alongside those provided by SourceKit-LSP. Running another build task clears the diagnostics from the previous build task.
Debugging
Visual Studio Code provides a rich debugging experience. See the Debugging documentation for more information.
The Swift extension relies on the Code-LLDB extension to enable debugging support.
The Swift extension will prompt you to configure settings for LLDB the first time you launch VS Code. You will need to either apply the configuration globally (user settings) or to your workspace (workspace settings) for the debugger to work properly.

By default, the extension creates a launch configuration for each executable
target in your Swift package. You may configure these yourself by adding a
launch.json file to the root folder of your project. For example, this
launch.json launches a Swift executable with custom arguments:
{
  "configurations": [
    {
      "type": "lldb",
      "name": "Debug swift-executable",
      "request": "launch",
      "sourceLanguages": ["swift"],
      "args": ["--hello", "world"],
      "cwd": "${workspaceFolder}",
      "program": "${workspaceFolder}/.build/debug/swift-executable",
      "preLaunchTask": "swift: Build Debug swift-executable"
    }
  ]
}
You can launch a debugging session via the Debug view in VS Code.
- Select the launch configuration you wish to debug.
- Click on the green play button to launch a debugging session.
The executable will be launched and you can set breakpoints in your Swift code that will be hit as code executes.
The screenshot below shows an example of debugging a Hello World program. It is paused on a breakpoint and you can see that the Debug View shows the values of variables in scope. You can also hover over identifiers in the editor to see their variable values:

Test Explorer
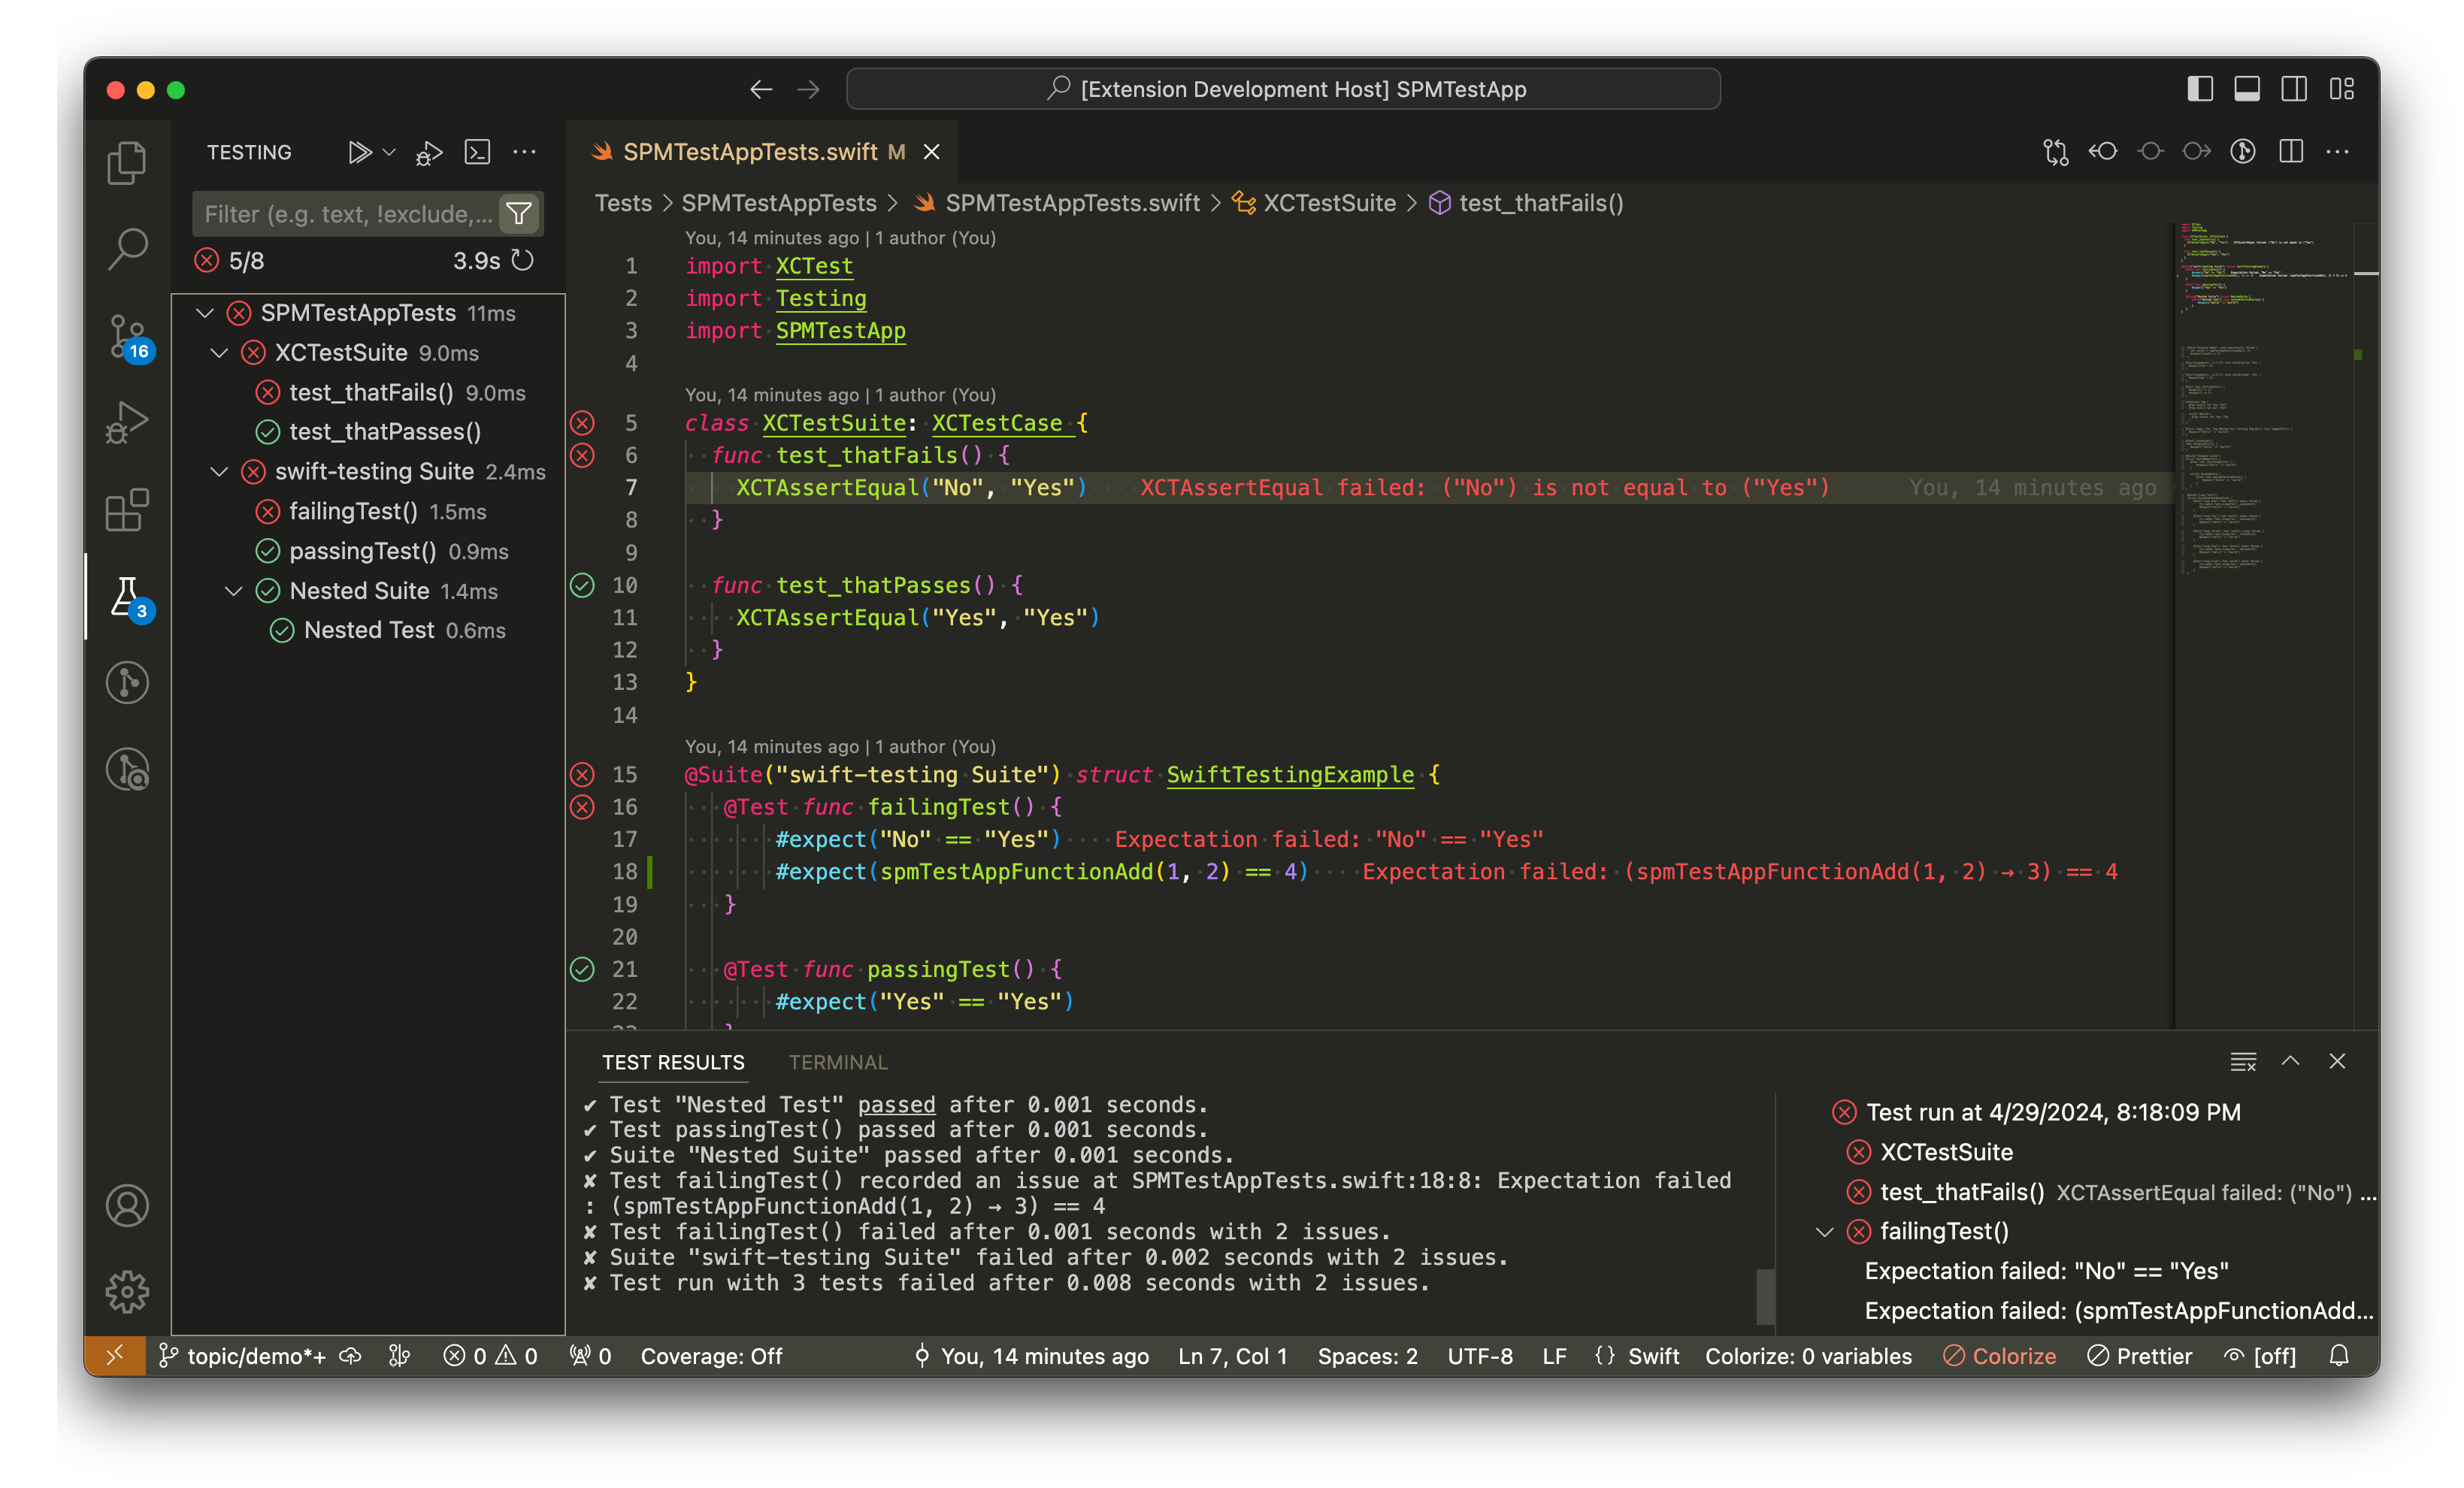
Visual Studio Code provides a Test Explorer view in the left sidebar which can be used:
- To navigate to tests
- To run tests
- To Debug tests
The Swift extension supports XCTest as well as Swift Testing. As you write tests they are automatically added to the Test Explorer.

To debug a test:
- Set a breakpoint
- Run the test, suite, or entire test target with the
Debug Testprofile.
The Run Test with Coverage profile instruments the code under test and opens a
code coverage report when the test run completes. As you browse covered files,
line numbers that were executed during a test appear green, and those that were
missed appear red. Hovering over a line number shows how many times covered
lines were executed. Line execution counts can be shown or hidden using the
Test: Show Inline Coverage command.
Swift Testing tests annotated with
tags
can be filtered in the Test Explorer using @TestTarget:tagName. You can then
run or debug the filtered list of tests.
The Swift extension does not support running Swift Testing tests in Swift 5.10 or earlier.
Advanced Toolchain Selection
The Swift extension automatically detects your installed Swift toolchain.
However, it also provides a command called Swift: Select Tooclhain... which
can be used to select between toolchains if you have multiple installed.
This is an advanced feature used to configure VS Code with a toolchain other
than the default on your machine. It is recommended to use xcode-select on
macOS or swiftly on Linux to switch between toolchains globally.
You may be prompted to select where to configure this new path. Your options are to:
- Save it in User Settings
- Save it in Workspace Settings
Keep in mind that Workspace Settings take precedence over User Settings:

The Swift extension will then prompt you to reload the extension in order to pick up the new toolchain. You must do so, otherwise the extension will not function correctly:

Contributors
The extension is developed by members of the Swift Community and maintained by the Swift Server Working Group.